Best DIY Home Security Systems of 2024
1. SimpliSafe – Best DIY Installation and Monitoring
Product Specs
| Equipment Costs | Packages starting at $280 |
|---|---|
| Monitoring Options | Professional and DIY |
| Monthly Monitoring Costs | $19.99 per month |
| Contract Lengths | Month-to-month |
| Installation Options | DIY or professional |
| Smart Platform Integration | Alexa and Google Home |

SimpliSafe launched in 2006, the same year as Twitter. But unlike the current X, SimpliSafe has stayed true to its roots, offering one of the best renter-friendly security systems. But the company has grown as well. Today, SimpliSafe can say its offerings are on par, or better in our opinion, with the DIY options from ADT, which has been around for 150 years.
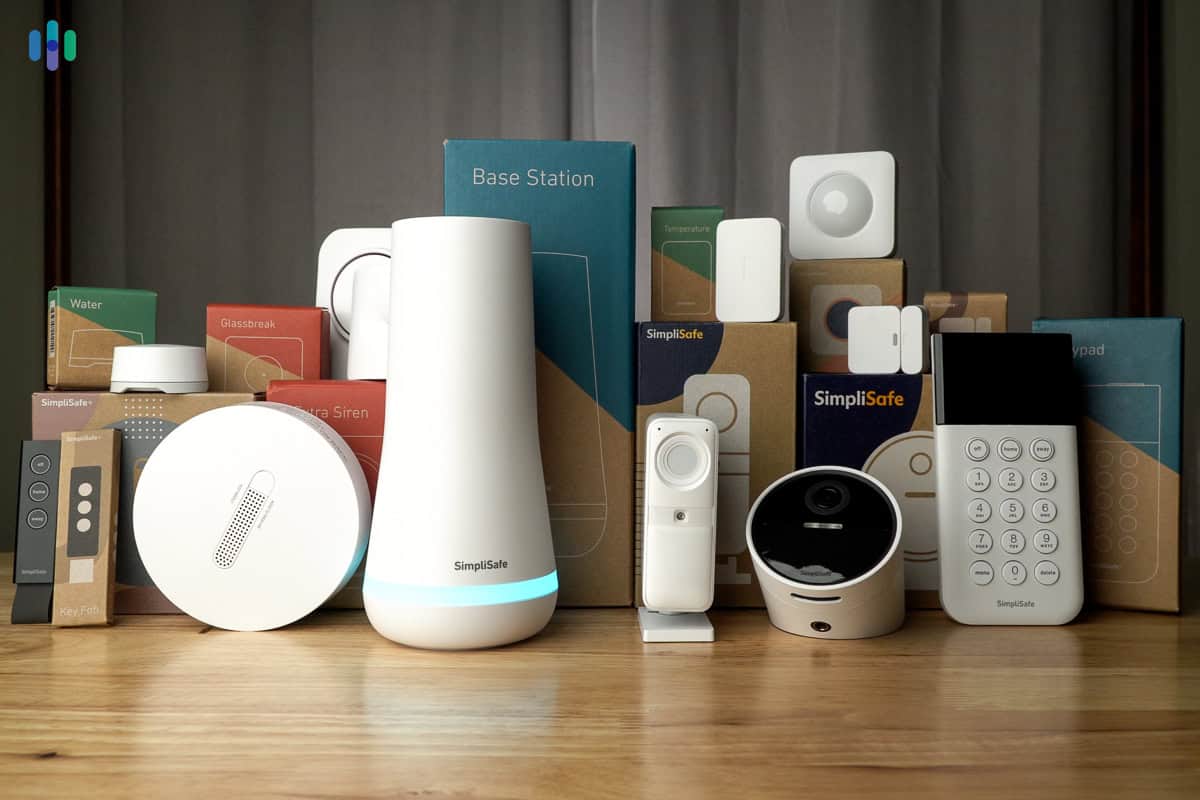
The SimpliSafe system we tested (pictured below) was very reliable, as you would expect in a home security system. It also had all kinds of advanced features and the 24/7 monitoring meant that we didn’t have to jump at every alert and push notification. While the company may have started out for people living in apartments, we now feel confident in recommending SimpliSafe as a security system for large homes.
>> More Details: SimpliSafe Video Doorbell Pro Review
SimpliSafe Equipment


We were really impressed by the quality of equipment from SimpliSafe. These devices were lightweight, but they were also very sturdy. In fact, one of our motion sensors was fine after a six foot drop, not that we recommend dropping your devices.
>> Compare: SimpliSafe vs. ADT
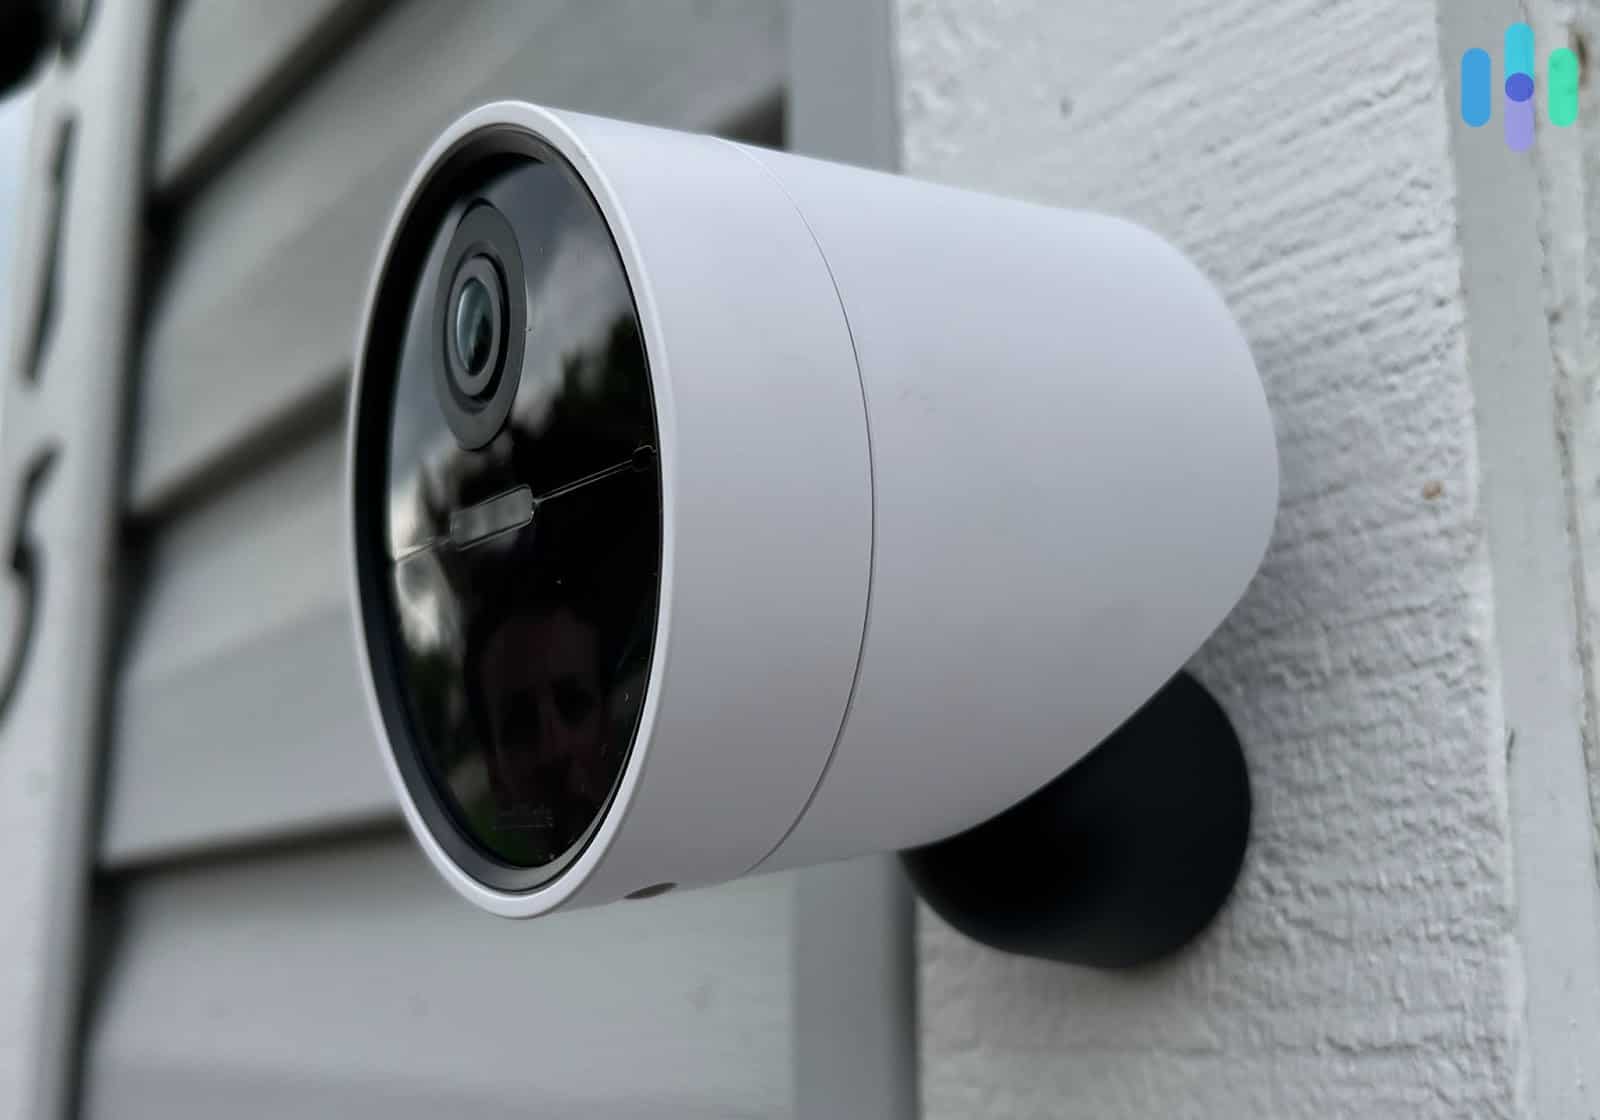
We were also impressed by what the equipment was capable of doing. While the base station’s LED glow was a nice design touch, the cellular backup made us feel confident that the power outage wasn’t going to compromise our system. In fact, our neighborhood experienced a four-hour power outage, but the SimpliSafe system kept humming along. That being said, some of our cameras did need power to keep functioning. Only our Outdoor Camera Pro is battery-powered.
We also need to point out that SimpliSafe offers a wide range of security and safety sensors, from glass break sensors and motion sensors, to carbon monoxide detectors. It also offers many different camera types, including indoor, outdoor, and doorbell cameras. One of the biggest drawbacks with the equipment from SimpliSafe is a lack of home automation, a feature that is available through companies like ADT. However, you can pair your SimpliSafe system with virtual assistants like Alexa and Google Assistant for voice control.1
| SimpliSafe security cameras | Price |
|---|---|
| SimpliCam (indoor camera) | $99.99 |
| Smart Alarm (indoor camera) | $139.99 |
| SimpliSafe Outdoor Camera | $189.99 |
| SimpliSafe Video Doorbell | $169.99 |
>> Further Reading: The Legality of Security Cameras and Video Surveillance
SimpliSafe Monitoring
As part of SimpliSafe’s DIY offering, we were given the option to monitor the system ourselves without added monthly fees. But without live monitoring, it was always our responsibility to check and verify notifications. Thankfully, we had the SimpliCam indoor camera (see our SimpliCam review) and outdoor camera to make checking in a bit easier.

For most users, we recommend upgrading to a professional monitoring plan. The two popular options are Standard and Core (formerly Fast Protect), priced at $21.99 and $31.99 per month. Two more options were added recently, called Pro and Pro Plus for $49.99 and $79.99 per month. SimpliSafe’s pricing has become a spectrum due to the addition of those two more expensive options, but we like that it still offers the cheaper plans.
We chose Core because it’s the cheapest that offers video verification and Live Guard Protection. Video verification allows SimpliSafe monitoring to view live camera feeds to confirm alerts, which can speed up police response.2 Live Guard, on the other hand, lets them use the two-way audio of the Smart Alarm indoor camera to send burglars packing. Those are impressive features for a relatively cheap plan.
FYI: The Pro and Pro Plus have a Live Guard-like feature called Active Guard Outdoor Protection, built for the outdoor camera. Pro enables overnight protection while Pro Plus makes that protection 24/7.
What We Like
- Set up in 30 minutes
- Indoor and outdoor security camera options
- Cellular and battery backup
- Optional professional monitoring
What We Don’t Like
- Live video monitoring for Smart Alarm indoor camera comes with privacy risks
- Recent monitoring rate increase
- Security cameras don’t record locally
- Security cameras require a separate cloud storage plan or the Fast Protect plan to record
Installing SimpliSafe
We installed SimpliSafe during our lunch break and still had enough time to finish our sandwich. All it took us was 30 minutes. Impressive, right? It’s even more impressive that half of that time was spent setting up the only hardwired SimpliSafe product, the Video Doorbell Pro. Without it, we would have been done in 15 minutes or so.
SimpliSafe is hands-down the easiest to install, but it isn’t perfect. We found out that the battery-powered outdoor camera needed to be charged before installation, so we charged it overnight and set it up the next day. But that was the only setback we faced.
Here’s the whole process:
- We set up the base station by plugging it in, and then we turned on the keypad by removing the battery tab. They connected to each other right away.
- We downloaded the app and signed in. We also linked the base station to our app and connected it to Wi-Fi.
- Using the app, we paired sensors individually with the base station. Most of them were battery-powered, so we simply removed their battery tabs to turn them on.
- We placed the sensors. They each came with a peel-and-stick adhesive backing; very convenient.
- We plugged in the indoor camera, scanned a QR code using the app, and connected it to Wi-Fi.
- The next day, after charging overnight, we followed the same steps to connect the outdoor camera to Wi-Fi. We then mounted it out on the porch.
A quick note on the installation, though: The peel-and-stick adhesive tape that comes with sensors are great if you want a fast and easy install, but we don’t recommend it for permanent installation. It tends to lose grip over time, especially when attached to concrete walls. It’s the reason one of our motion sensors crashed, and it’s not just a SimpliSafe problem. That’s true for all DIY security systems.
Whenever possible, anchor your sensors to walls using screws. Most SimpliSafe sensors come with a mounting template.
>> Read More: The Best Battery-Powered Security Cameras


2. Cove – Most Affordable
Product Specs
| Equipment Costs | Must customize package |
|---|---|
| Monitoring Options | Professional |
| Monthly Monitoring Costs | Starting at $17.99 per month |
| Contract Lengths | No contract required |
| Installation Options | DIY |
| Smart Platform Integration | Alexa and Google Home |

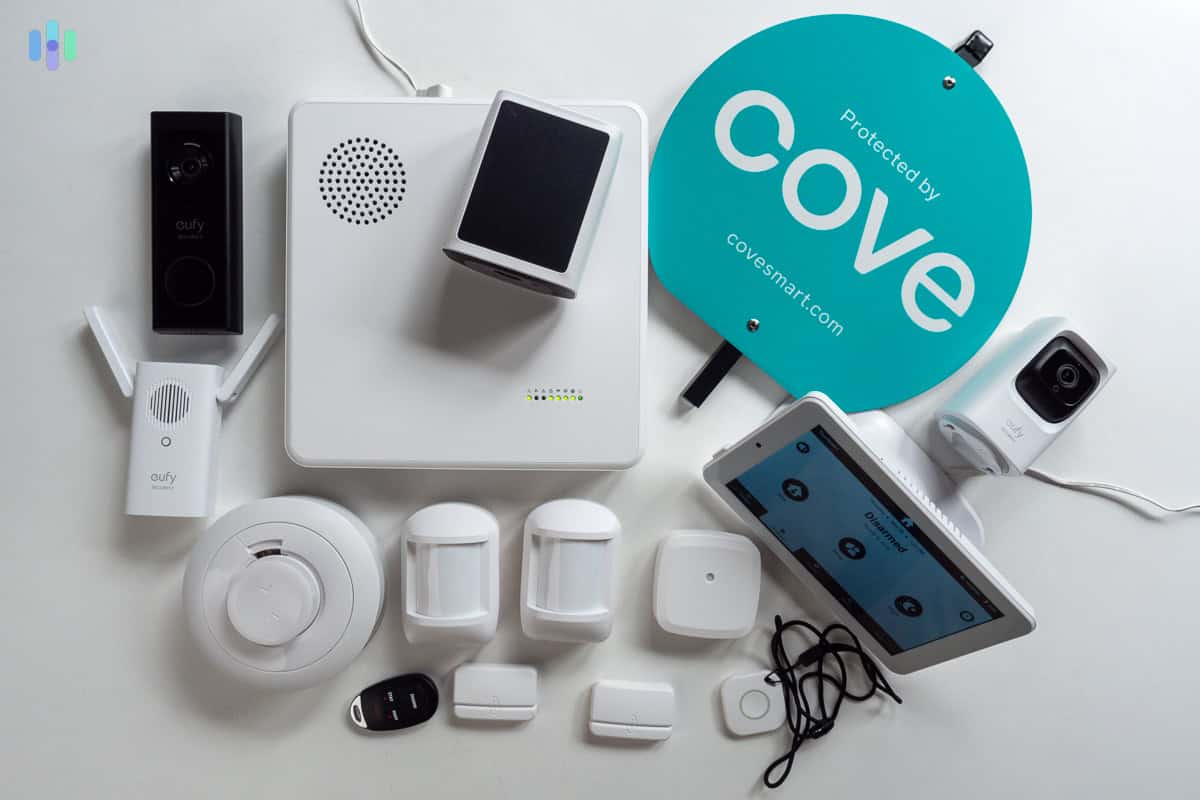
Cove is a security system you can install on your own, but not self-monitor like you can with SimpliSafe. Cove requires a monthly fee, but you still save on installation costs. Cove is actually the most budget-friendly option. Our eight-piece Cove system cost us around $300, including cameras. We also received a generous 65-percent off discount, cutting the price of the door sensor down to just $7.50. You see now why it’s our budget pick.
We didn’t just get lucky, either. For most of the year, Cove offers discounts between 40- to 60-percent. The 65-percent off deal comes about three to four times a year, especially around special days like Black Friday, Fourth of July, Christmas, and New Year. So if you can, time your purchase to coincide with holidays.
>> Related: Affordable but Top-Quality Security Systems
Cove Equipment
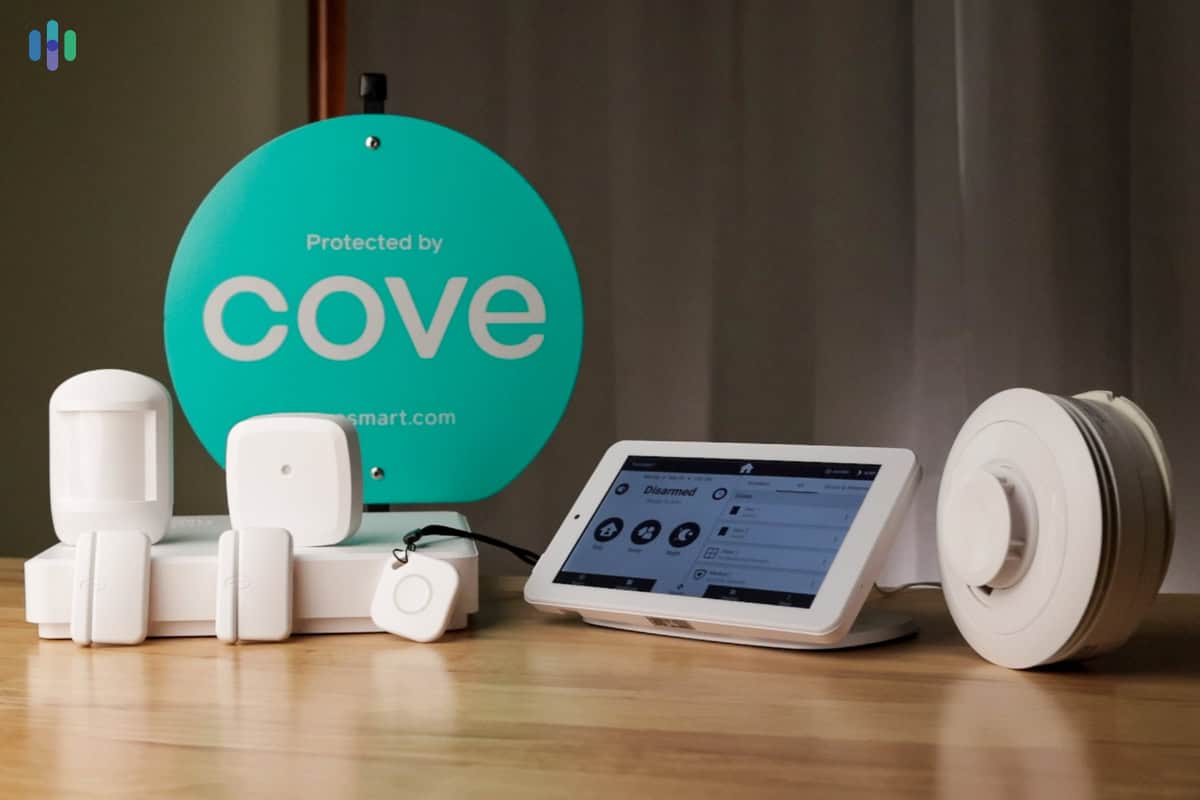

Cove let us pick from a wide range of security components. They weren’t as high-quality as the sensors from ADT Self Setup and SimpliSafe. In fact, they felt plastic-y and a little on the lightweight side. We were careful not to accidentally drop them this time.
We got ourselves a bunch of security and safety sensors (they have smoke alarms, unlike abode), plus a couple of security cameras. The cameras were from the brand Eufy. They offered great specs, like 2K video quality, but just like the sensors, they didn’t feel as durable as our top security camera options, such as the ones from Lorex. (See our Lorex review.) In any case, they were affordable. We got one outdoor camera for free, and an indoor camera for $49.99 with discounts applied.
>> Learn More: Eufy 2K Camera Review
Cove Monitoring
Cove gave us two monitoring options, both of which were for professional monitoring. The system doesn’t work as a self-monitored alarm.
| Feature | Basic | Plus |
|---|---|---|
| $5 per month equipment reward | No | Yes |
| 24-hour battery backup | Yes | Yes |
| 24 / 7 professional monitoring | Yes | Yes |
| Alexa and Google Home integration | No | Yes |
| Cellular backup | Yes | Yes |
| Environmental monitoring | Yes | Yes |
| Hourly automated system check | Yes | Yes |
| InstaText | Yes | Yes |
| Length of equipment warranty | 1 Year | Lifetime |
| LiveAssist | Yes | Yes |
| Smartphone control | No | Yes |
| Smash and grab protection | Yes | Yes |
| TripleTouch communications | Yes | Yes |
| Monthly cost | $17.99 | $27.99 |
That’s a long list of features for plans that cost less than $30 per month, but to summarize, the Plus plan adds access to security camera livestreaming and recording, as well as priority customer support. It also upgrades the equipment warranty from one year to lifetime, meaning, for as long as you’re signed up to the Plus plan. In our opinion, that’s well worth the $10 increase, which is why it’s what we went with.
FYI: Unlike SimpliSafe, which increased monitoring prices three times over the past three years, Cove has only ever increased its prices once in 2022. That’s not all good news though; Cove has barely improved its monitoring features since then, while SimpliSafe pulled ahead leaps and bounds.
What We Like
- Affordable equipment and frequent deals
- Systems are fully customizable
- Ships pre-paired sensors and equipment
- Professional monitoring with security camera support for less than $30 per month
What We Don’t Like
- Some pieces of equipment don’t seem durable
- No self-monitoring option
- Limited security camera options
- Security cameras are accessed via a third-party app

Installing Cove
Cove ships their security systems ready to work. So when we opened the box, we simply plugged in the base unit and set up the touch screen controller. We didn’t even need to use our phones until it was time to connect the system to our account. The touch screen keypad guided us through the process. And by the way, Cove was the only DIY system we tested with a touch screen keypad included, which is impressive given Cove’s low pricing.
Once the system was fully installed, we followed the keypad’s instructions for testing the system. We activated the monitoring subscription, did a test run with customer support, and that was it! It was simple, user-friendly, and straightforward, exactly what you want from a DIY system.
>> Also See: The Best Security Systems With Apps
There was one downside stemming from the fact that Cove’s cameras are made by Eufy. We needed both the Cove app and the Eufy app to manage our security system. We armed and accessed our sensors via the former, but used the latter to playback recordings and watch live video streams from the cameras. It wasn’t a deal-breaker, but it was inconvenient having to switch back and forth between apps.
Pro Tip: Our next pick, ADT Self Setup, also uses security cameras from a different manufacturer. But unlike Cove, ADT integrated them into the same app used to manage the security system.
3. ADT Self Setup – Best Equipment
Product Specs
| Equipment Costs | Starting at $195 |
|---|---|
| Monitoring Options | Professional or DIY |
| Monthly Monitoring Costs | Starting at $24.99 |
| Contract Lengths | Monthly |
| Installation Options | DIY |
| Smart Platform Integrations | Google Nest Cams, Google Assistant, Alexa |
ADT is best known for its professionally installed and monitored security system. You can see it in action in our ADT review. Not too long ago, however, it introduced its own version of a DIY security system, which is a combination of equipment from two home security powerhouses: ADT and Google Nest.
The aptly named ADT Self Setup includes sensors from ADT, as well as high-end security cameras and a video doorbell from Google Nest. That, plus ADT’s world-class monitoring service, makes ADT Self Setup worthy of a spot on this list.
>> Read More: Google Nest Doorbell (Battery) Review
ADT Self Setup Equipment
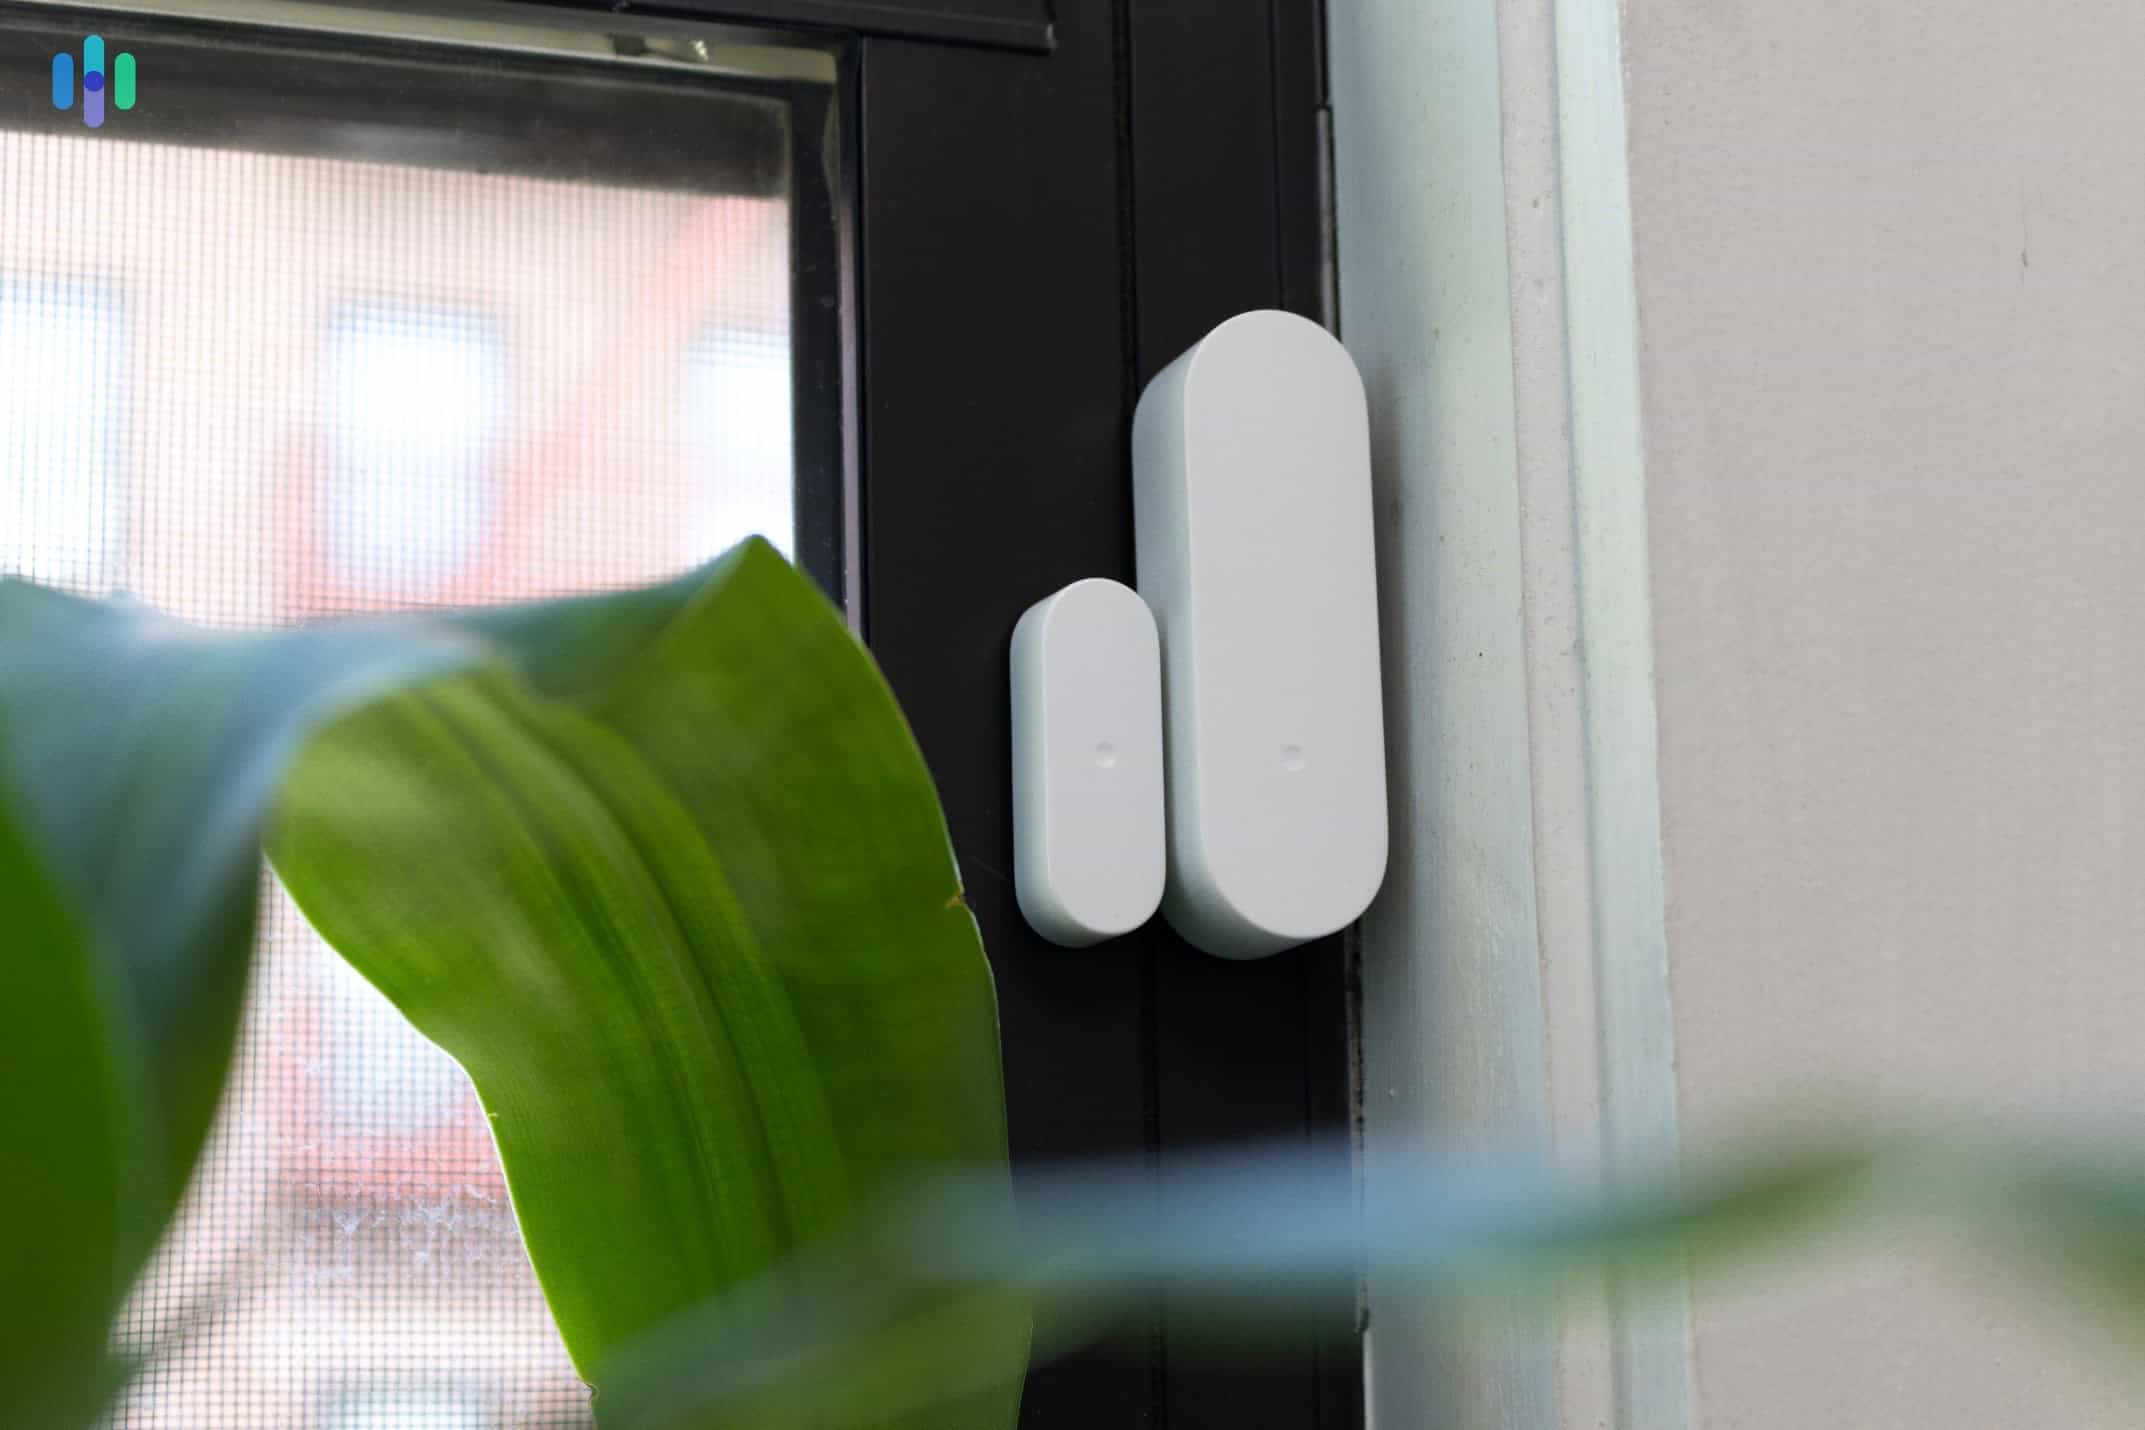

We’ve long known and proven the quality of ADT equipment, and ADT Self Setup is no different. It uses the same equipment as the professionally-installed ADT security system. They seem durable and they have that heft we are looking – opposite of what we saw from Cove equipment.
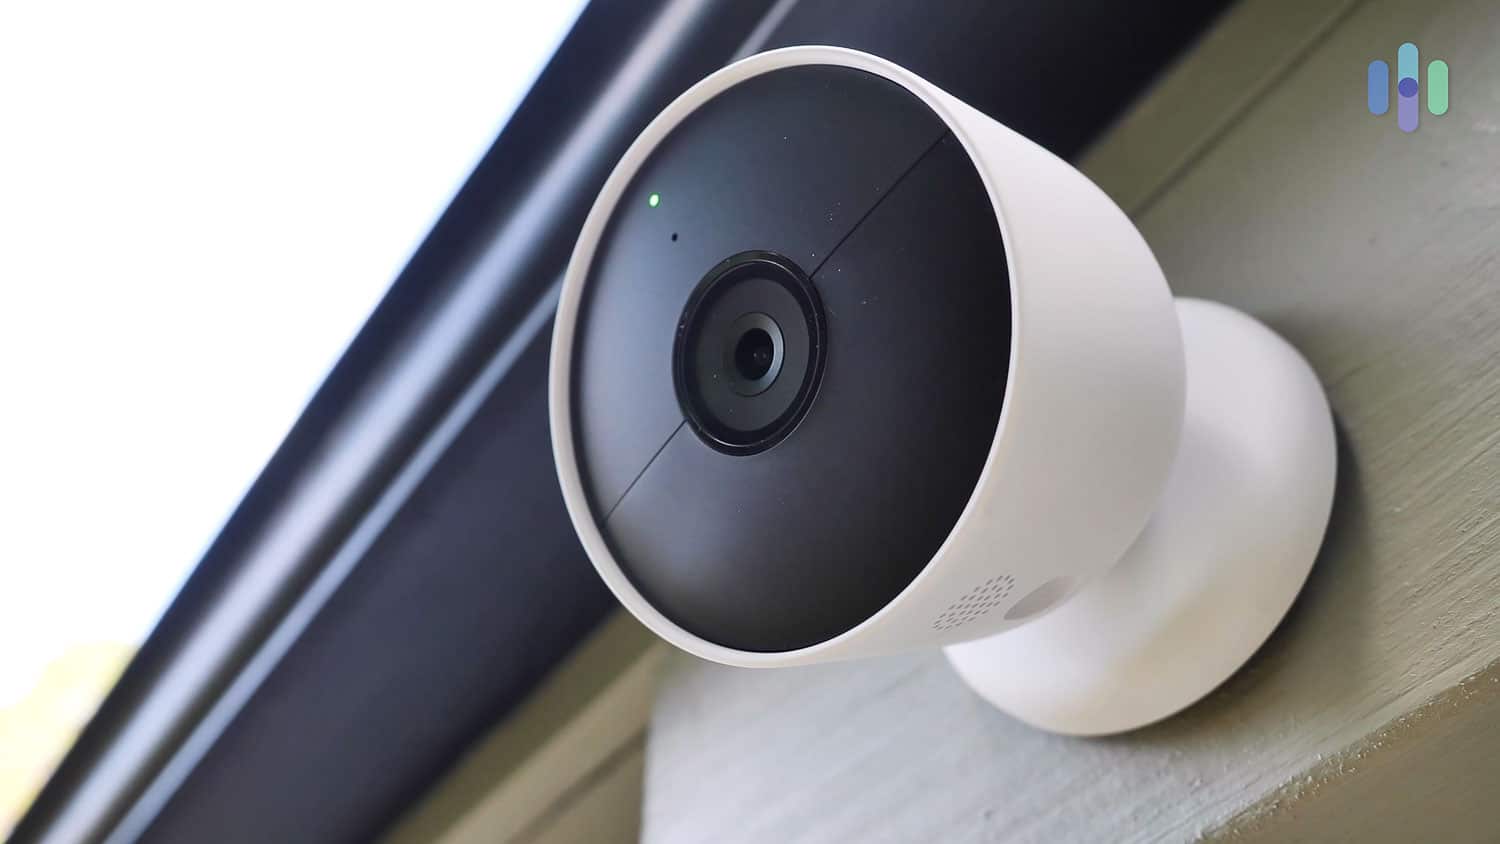
The highlight though are the cameras. ADT uses security cameras from Google Nest – technically a third-party – but unlike our experience with Cove, the ADT+ app managed and monitored the cameras directly. The same goes for other Google products like the Nest Hub Max. So even though we already tested the Google Nest Cam (battery) as a standalone unit, testing it and the other Nest Cams as part of an ADT system was a new and refreshing experience to us.
ADT Self Setup Monitoring
Monitoring costs the same whether you have ADT Self Setup or the professionally installed ADT system. The advantages with ADT Self Setup is that you can also self-monitor and you won’t need to sign a contract if you buy yourself an ADT monitoring plan.
ADT Self Setup doesn’t offer any less features either. Your system will be monitored by any of the 12 ADT monitoring centers equipped with backup generators, communication lines, and servers. You will also access ADT’s SMART Monitoring platform, which speeds up the monitoring response time by using text-based alerts. Here’s how the plans are priced:
| ADT Self Setup professional monitoring | Essential | Essential + Video |
|---|---|---|
| Cost per month | $29.99 | $34.99 |
| Contract | Monthly | Monthly |
| Professional monitoring | Yes | Yes |
| Home Automation | No | Yes |
| SMART Monitoring | Yes | Yes |
| Nest Aware | No | No |
| Video verification | No | No |
>> Related: The Best No-Contract Security Systems
What We Like
- Mix of ADT and Google Nest equipment
- High-end security cameras with person and package detection
- Nest Aware subscription included in Essential + Video plan
- Affordable professional monitoring
What We Don’t Like
- Limited sensor options
- No included keypad (costs an extra $89.99)
- Bulky hub
- Not as smart home-friendly as other options
Installing ADT Self Setup
Right off the bat, we noticed the hub’s bulky form. It stood about six inches tall and was about 4.5 inches wide at the base. Fortunately, it’s now cylindrical, so it takes up less space than the rectangular one ADT had before. The LED ring around the top that doubled as a night light for us was also a nice touch.

ADT Self Setup didn’t include a touch screen keypad, so unlike with Cove, we had to setup everything through the ADT+ app. We first connected the hub to our phone via Bluetooth, and then entered our Wi-Fi information to connect the hub. After that, we paired sensors. The initial setup took less than 10 minutes all in all.
After that, we set up the Nest Cam cameras and the Nest Hub Max smart display. They were previously set up with our Nest account from when we reviewed them, but if it’s your first time setting them up, allot about five minutes for each camera and device. In our case, though, we just logged into our Google Nest account on the ADT+ app to pair the Nest devices.
Note: The hub only connects to 2.4 GHz Wi-Fi channels. If you have a dual-band router, make sure you connect your phone to the 2.4 GHz band before pairing the hub. If you’re connected to the 5 GHz channel, it simply won’t connect.
4. abode – Most Flexible Monitoring Options
Product Specs
| Equipment Costs | Packages starting at $140 |
|---|---|
| Monitoring Options | Professional and DIY |
| Monthly Monitoring Costs | $24.99 per month |
| Contract Lengths | Month-to-month or yearly |
| Installation Options | DIY or professional |
| Smart Platform Integration | Alexa, Google Home, and Apple HomeKit |


abode is similar to SimpliSafe in many aspects, but it has a deeper reach into home automation, making it a particularly great choice for those who want a high-tech security system.
abode works with a number of third-party devices. That means you’re not limited to abode equipment. You can pair Z-Wave, Zigbee, and even HomeKit products. (That’s why it’s one of the best security systems for Apple users.) Of course, all that means a more complex setup process, but even though our home is well-equipped with home automation devices, it still took us less than an hour to set up abode.
>> Related: The Best Smart Home Security Systems
abode Equipment
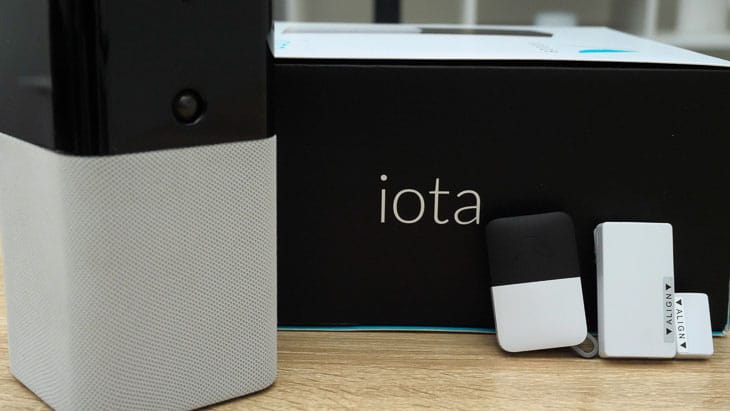

abode security systems are anchored by a hub, for which abode offers three options: Smart Security Hub, abode Security Hub, and iota All-in-One Hub.
| Smart Security Hub | abode Security Hub | iota All-in-One Hub |
|---|---|---|
| No built-in camera | No built-in camera | Built-in camera |
| Ethernet-only | Ethernet or Wi-Fi | Ethernet or Wi-Fi |
| Loud siren | Loud siren | Loud siren |
| Alexa, Google Assistant, HomeKit, Z-Wave, Zigbee | Alexa and Google Assistant | Alexa, Google Assistant, HomeKit, Z-Wave, Zigbee |
| No built-in motion sensor | No built-in motion sensor | Built-in motion sensor |
We decided on the most advanced option, the iota All-in-One, because the hub itself contains a built-in 1080p security camera, a siren, a motion sensor, battery backup, and a cellular chip. From there, we picked from the available abode packages priced between $279.99 and $399.99. The packages contain door and window sensors, acoustic sensors (aka glass-break sensors), and motion sensors. We also added add-ons like an indoor camera, smart bulbs, and smart plugs.
Product Stats: abode doesn’t offer smoke alarms, but has a sound sensor that listens for the beeping sound of smoke alarms. If your existing smoke alarms sound, the listening device would alert you. Just check with abode first to make sure your smoke alarms make the right frequency sound detectable by the listener.


abode Monitoring
abode has the most flexible monitoring options we’ve ever seen. It has free self-monitoring, premium self-monitoring ($6.99 per month), and professional monitoring ($22.99 per month).
We initially went with the premium self-monitoring option, called Standard, which gave us 10-day video history, person detection for our cameras, access to the CUE home automation engine (similar to IFTTT), and priority customer support. Note: No professional monitoring.
>> Learn More: The Best Security Systems With IFTTT Support
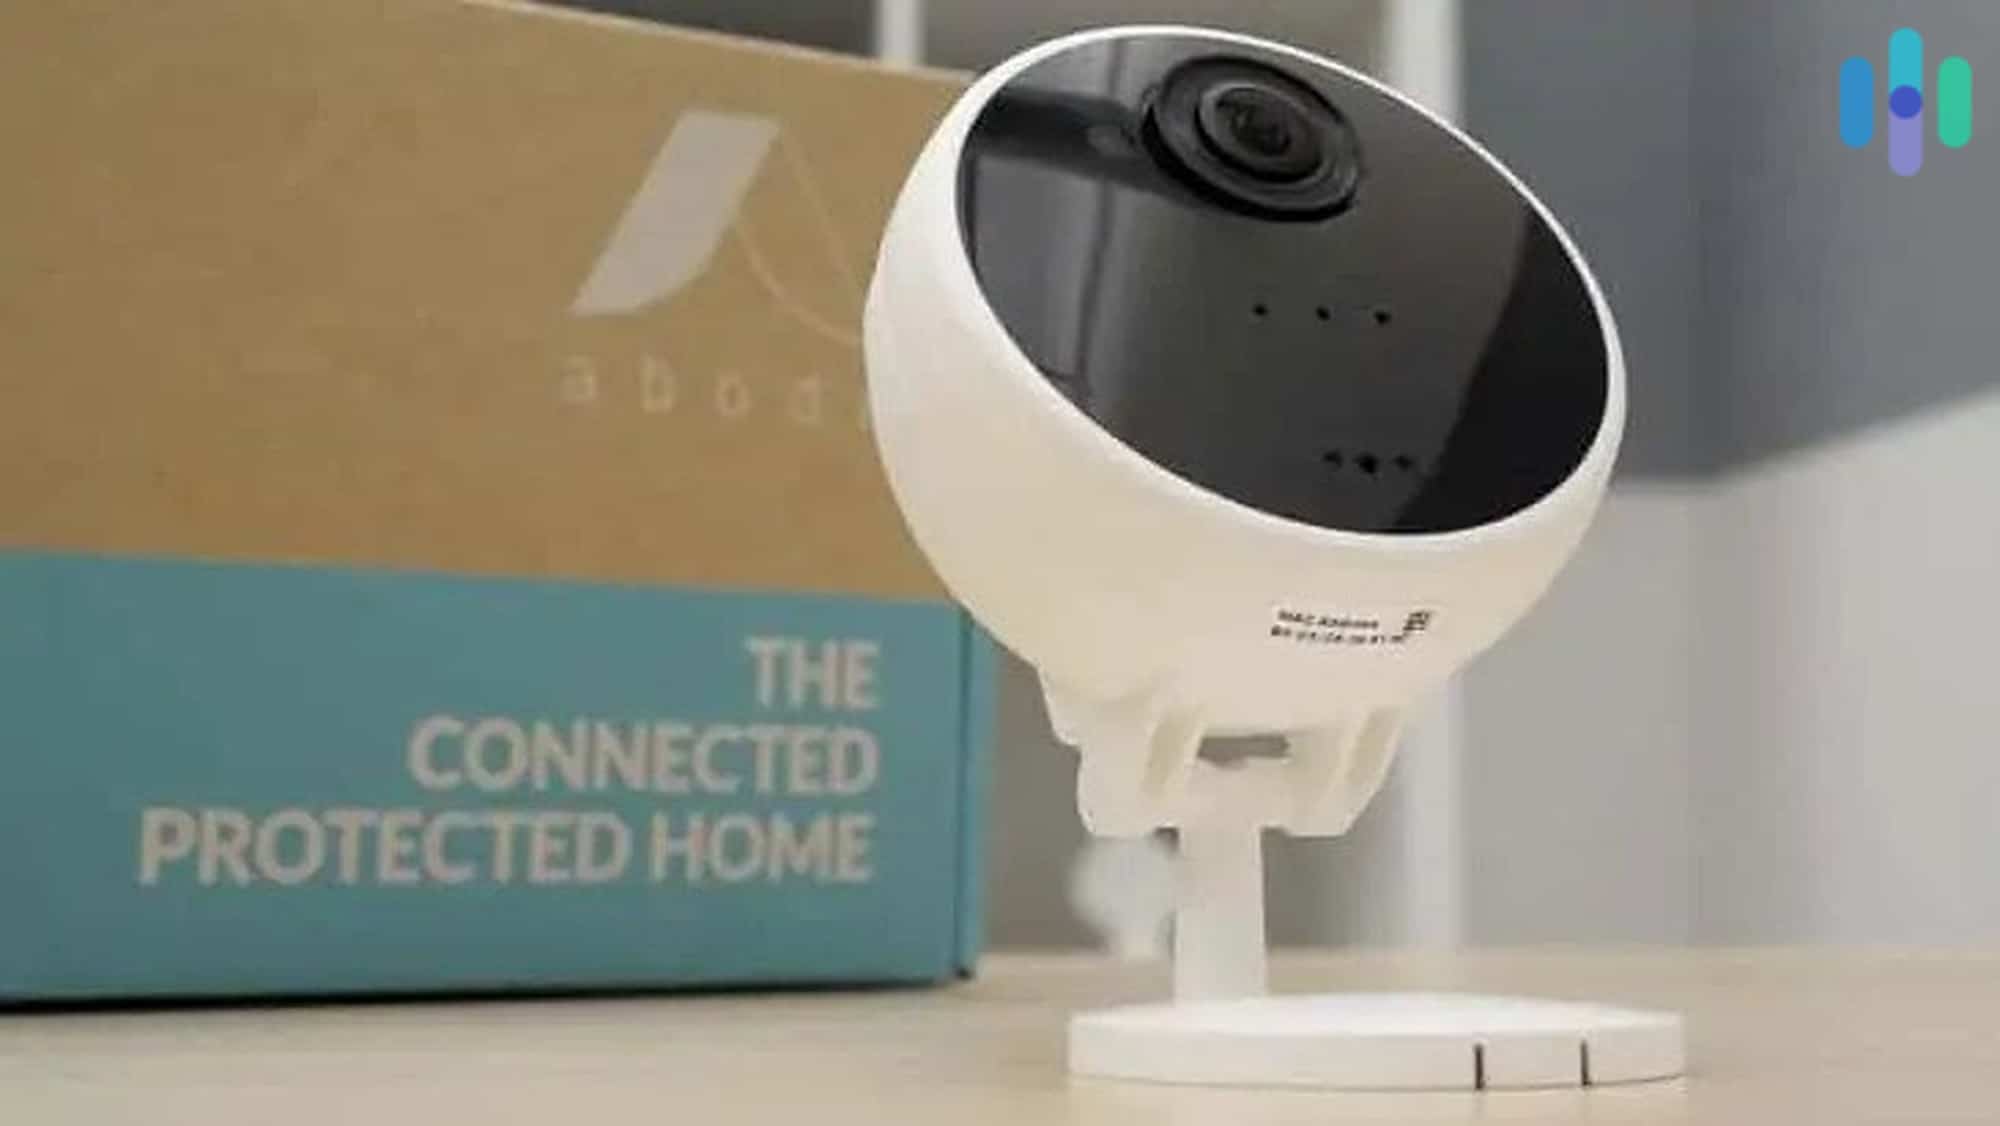

After one month, however, we felt that we needed more, so we upgraded to professional monitoring. The main reason was the ability to access cellular backup. Although we connected the hub via an Ethernet cable (which is more reliable than Wi-Fi), we know our internet cuts out occasionally. Cellular backup made sure abode was always online. That alone made the $24.99 we paid abode worth it.
>> Learn More: The Best Security Systems With Cellular Backup
What We Like
- Choice between different types of hubs
- Affordable security cameras (as low as $34.99)
- Quick and easy DIY installation
- Free and premium monitoring plans
What We Don’t Like
- Lots of missing features from free monitoring option (e.g., home automation)
- Internet-reliant without professional monitoring
- No cellular backup even for premium self-monitoring plan
- No smoke alarms or carbon monoxide detectors
Installing abode
abode didn’t give us much headache with the install. It was fairly standard; we set up the hub, connected it to the app, and then paired the sensors.
Our one gripe is that the hub had to be connected to our router via an Ethernet cable first even if you’re planning on using Wi-Fi. It needs the Ethernet connection so you can register the Wi-Fi SSID and password on the app. We decided to keep the Ethernet connection for slightly better reliability, but that’s something to keep in mind if you’re looking for a completely wireless DIY setup. It supports Wi-Fi, but it needed an Ethernet connection for the setup.
As for the sensors and other components, we didn’t have much trouble pairing them. The entry sensors came pre-paired with the hub, so after pulling out their battery tabs, they paired instantly. For the camera, however, we had to initiate the pairing process via the abode app. It took about five minutes – roughly as long as it took us to set up our Nest Cam (battery). All in all, we set everything up in less than 45 minutes.
5. Frontpoint – Best Customer Service
Product Specs
| Equipment Costs | Starting at $99 |
|---|---|
| Monitoring Options | Professional only |
| Monthly Monitoring Costs | Starting at $49.99 |
| Contract Lengths | 1-36 months |
| Installation Options | DIY |
| Smart Platform Integration | Alexa and Google Home |


Customer service rarely gets talked about, but with DIY systems, good customer service is critical. You’re doing all the installation work, so you’ll want to choose a company willing to help every step of the way. That’s where Frontpoint excels, in our opinion. It offers great equipment and a decent monitoring service, but the customer service is simply top-notch. We had our own encounter with customer support during setup, which we’ll share below, and all we can say is that we were satisfied with their response.
>> Further Reading: Frontpoint FAQs
Frontpoint Equipment
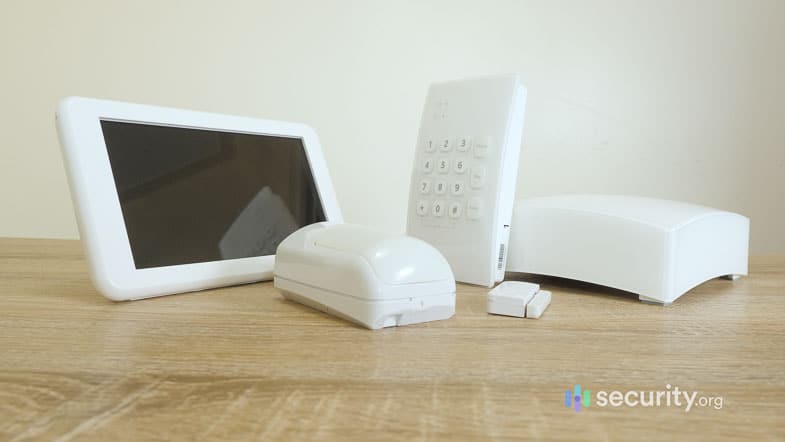

We built a custom Frontpoint system from scratch, starting with the basic kit that costs $129. It included a hub, a motion sensor, and an entryway sensor — pretty bare bones — but we expanded it by adding more sensors, security cameras, and even a smart lock and thermostat. All in all, we spent over $500 on equipment, but if that’s too much to pay at once, you can choose to finance it and pay over 36 months following a credit check.
Take note that Frontpoint occasionally offers discounts. You can sometimes get the basic kit for as low as $69, and add-on equipment sometimes has markdowns of up to 60 percent. We say take advantage of those deals if possible; Frontpoint isn’t the cheapest option around.
>> Alternative Options: The Best Security Systems Without Credit Checks
Frontpoint Monitoring
The buying process for Frontpoint was all online, just like with SimpliSafe and abode. But there’s one tiny difference: Frontpoint requires professional monitoring. Unlike our two other picks which let us add or remove professional monitoring, Frontpoint’s monitoring service was automatically added to our cart. In fact, we had to fill in our details (name, monitored address, emergency contact numbers, etc.) before we could checkout.
The monitoring subscription didn’t start until we activated the system, though, after which we paid $49.99 per month. We also signed a three-year lock-in contract.
Those — Frontpoint’s pricing and the contract — were not negotiable. Frontpoint offers only one monitoring option that covers everything from cellular backup and monitoring to cloud video storage and home automation. It bode well for us because we bought a complete Frontpoint system, but that universal pricing is the reason we don’t recommend it for basic home security. The price is the same whether you have a couple of sensors or a dozen of them. Self-monitoring is also not an option.
What We Like
- Customer support available until 11 p.m. (EST)
- 30-day money-back guarantee and three-year equipment warranty
- Semi-affordable equipment
- Functional app
What We Don’t Like
- Universal monitoring pricing for all systems
- Three-year contract
- Limited smart home options
- May require a credit check
Installing Frontpoint
Our Frontpoint installation didn’t go as smoothly as our SimpliSafe and abode installations. We got the package late afternoon and immediately got to setting it up. We started with the hub. We plugged it into a wall outlet and then opened the Frontpoint app on our iPhone, which guided us through setting up the hub and pairing it with the keypad. So far, so good.
Next, we connected the sensors and the cameras. The sensors had a ‘pair’ button that we pressed and held to make them discoverable. On the other hand, since the cameras needed a Wi-Fi connection, we set them up via the app. It was a standard security camera installation.
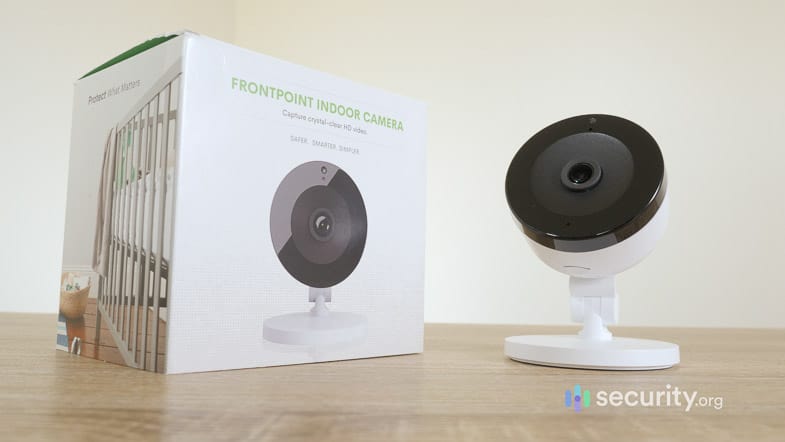

One door sensor, however, refused to connect even after several tries, so we skipped it to finish the rest. After about 30 minutes, we circled back to it and spent another 15 minutes or so trying to connect it. It was past seven o’clock when we decided to give Frontpoint a call. We were surprised we actually got through. Most alarm companies don’t have customer support after normal office hours.
The agent we spoke with helped us troubleshoot the door sensor and after a few minutes, he concluded that it must be broken. Frustrating, yes, but things like that happen when you DIY. The silver lining though, was that he immediately put in a request for a replacement, which was delivered to us two days later. That’s top-notch service, in our opinion.
FYI: No company is perfect, so while we had a great experience with Frontpoint and believe it has better customer service than most, it’s not a guarantee that all interactions with Frontpoint customer support will end like it did for us.
6. Deep Sentinel – Best Video Monitoring
Product Specs
| Equipment Costs | Starting at $399 |
|---|---|
| Monitoring Options | Professional and DIY |
| Monthly Monitoring Costs | Starting at $60 |
| Contract Lengths | 1-12 months |
| Installation Options | DIY |
| Smart Platform Integration | None |


Deep Sentinel isn’t your typical security system. It relies solely on AI-powered cameras to detect intrusions. What sets it apart from the likes of Arlo and Lorex, which also offer AI-powered cameras, is that it offers live video monitoring. This is similar to SimpliSafe’s Live Monitoring for Smart Alarm.
Of course, having strangers monitor your camera can be a cause for privacy concerns. To fix that, Deep Sentinel has a thorough vetting process for its monitoring agents. On top of that, Deep Sentinel requires that its cameras be placed outdoors — never indoors. That way, they can stop burglars before they get in while also preserving your privacy.3
>> Further Reading: Do Security Cameras Deter Crime?
Deep Sentinel Equipment
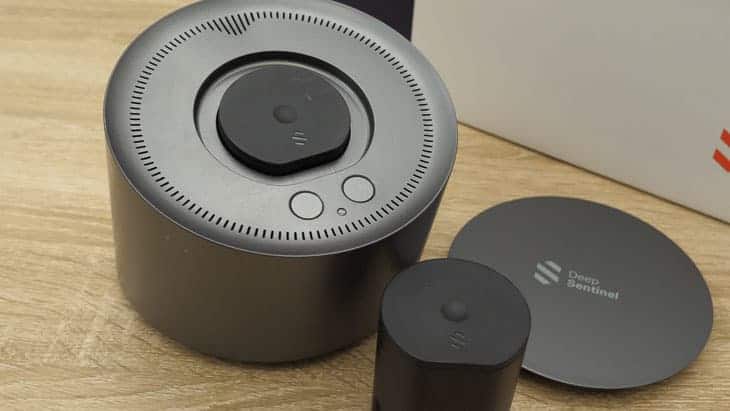

Deep Sentinel offers only security cameras. They are battery-powered and come with removable batteries, plus each system requires a hub that provides local video storage and doubles as a charging station.
The specs of the camera are decent. It’s comparable to the Arlo Pro 3 we reviewed — with a weatherproof casing, three-month battery life, a 130-degree viewing angle, two-way talk, and AI person detection — but with slightly lower video resolution. Deep Sentinel is 1080p, while Arlo Pro 3 is 2K.
Deep Sentinel Monitoring
The most interesting aspect of Deep Sentinel is its monitoring. First, let’s cover the cost. As we expected, Deep Sentinel’s pricing is higher than others on this list. It costs a whopping $100 per month for one camera, plus $50 per month for each additional camera. That’s $200 per month for our three-camera system. Deep Sentinel isn’t cheap, and here’s why.
When the camera detects a possible intruder, it starts streaming to the LiveSentinel monitoring center. A trained guard there will check the footage to verify it, and if it’s a real threat, they’ll use the camera’s two-way audio to engage the intruder. The goal is to make the intruder go away before they get inside your home. If that doesn’t work, Deep Sentinel will call the police to submit a verified dispatch request. That real-human engagement is what customers pay for.
Is it worth the over $100 monthly fee? Maybe for some, but it’s clearly not for everybody.
>> Alternative Options: The Best Outdoor Security Cameras
What We Like
- Live video monitoring and response
- AI-powered detection and human verification
- Local and cloud recording included
- Easy DIY installation
What We Don’t Like
- Expensive hardware ($499 for one camera and hub)
- Perimeter security only
- Potential privacy issues
- Short battery life (2 to 3 months)

Installing Deep Sentinel
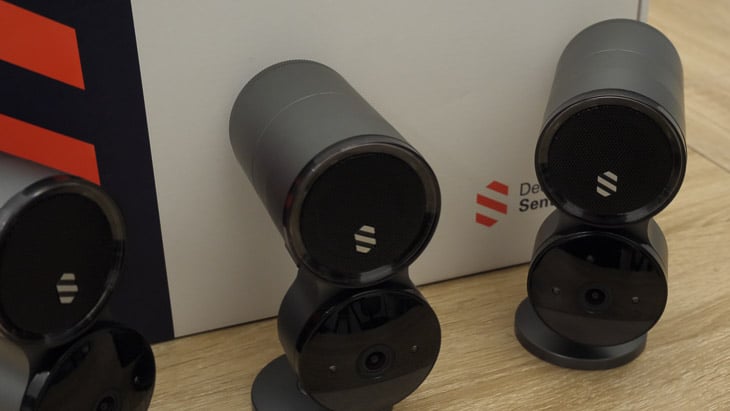
The Deep Sentinel equipment looked intimidating to install, but the setup process was actually quite easy, especially since the cameras were wireless and battery-powered. We first set up the hub, which connected to our router via Wi-Fi. Once it was on, we inserted the large, cylindrical batteries into the cameras. They booted up and paired with the hub in seconds. Deep Sentinel pre-paired the cameras before shipping.
What ate up most of our time was installing the cameras. It helped that they were wireless with a 100-foot wireless range, but we still had to experiment with the positioning to make sure they had a clear view of the most important areas — our front door, the pathway to our house, and our backyard. All in all, we spent about 45 minutes mounting the cameras, in addition to the 15 minutes we spent unboxing them.
FYI: Deep Sentinel also offers Power over Ethernet (PoE) cameras, which are more reliable than their wireless cameras. However, these PoE cameras require professional installation.
link

